Many organizations require volunteers to fill out an Application prior to being eligible to participate.
We recommend that you combine your Application with the next step in a volunteer's onboarding, intake or vetting journey. For instance, you could combine an Application with:
- Scheduled onboarding sessions,
- Interviews, or
- Training sessions.
To create a Volunteer Application/Interest Form, follow these steps:
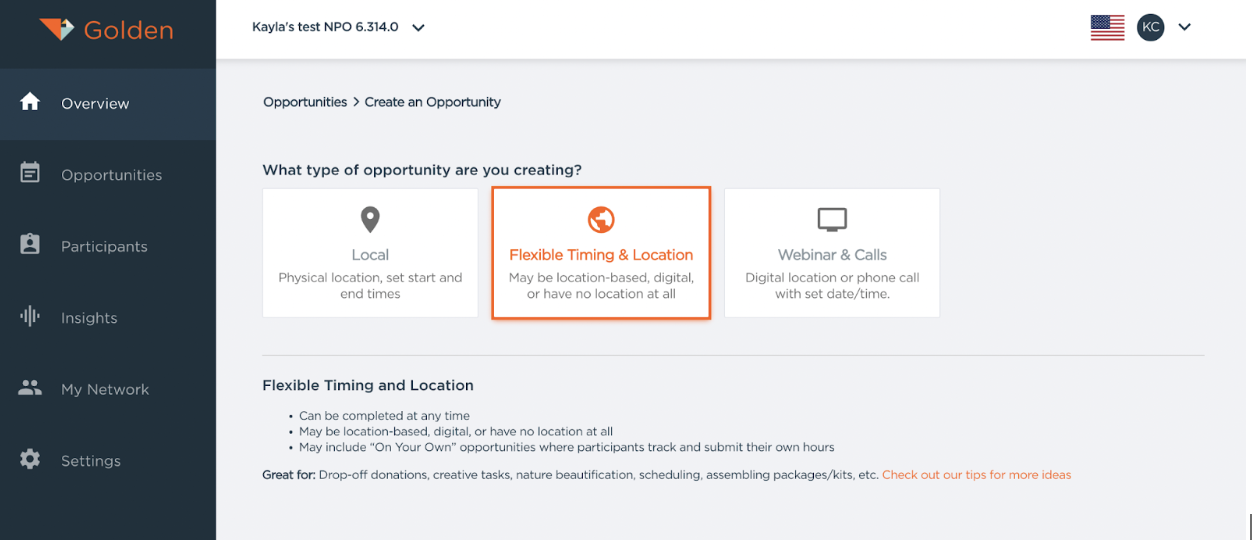
1. Get Started:
- In your dashboard, create a new Opportunity
- Under “What type of Opportunity are you creating?” - select “Flexible Timing & Location”
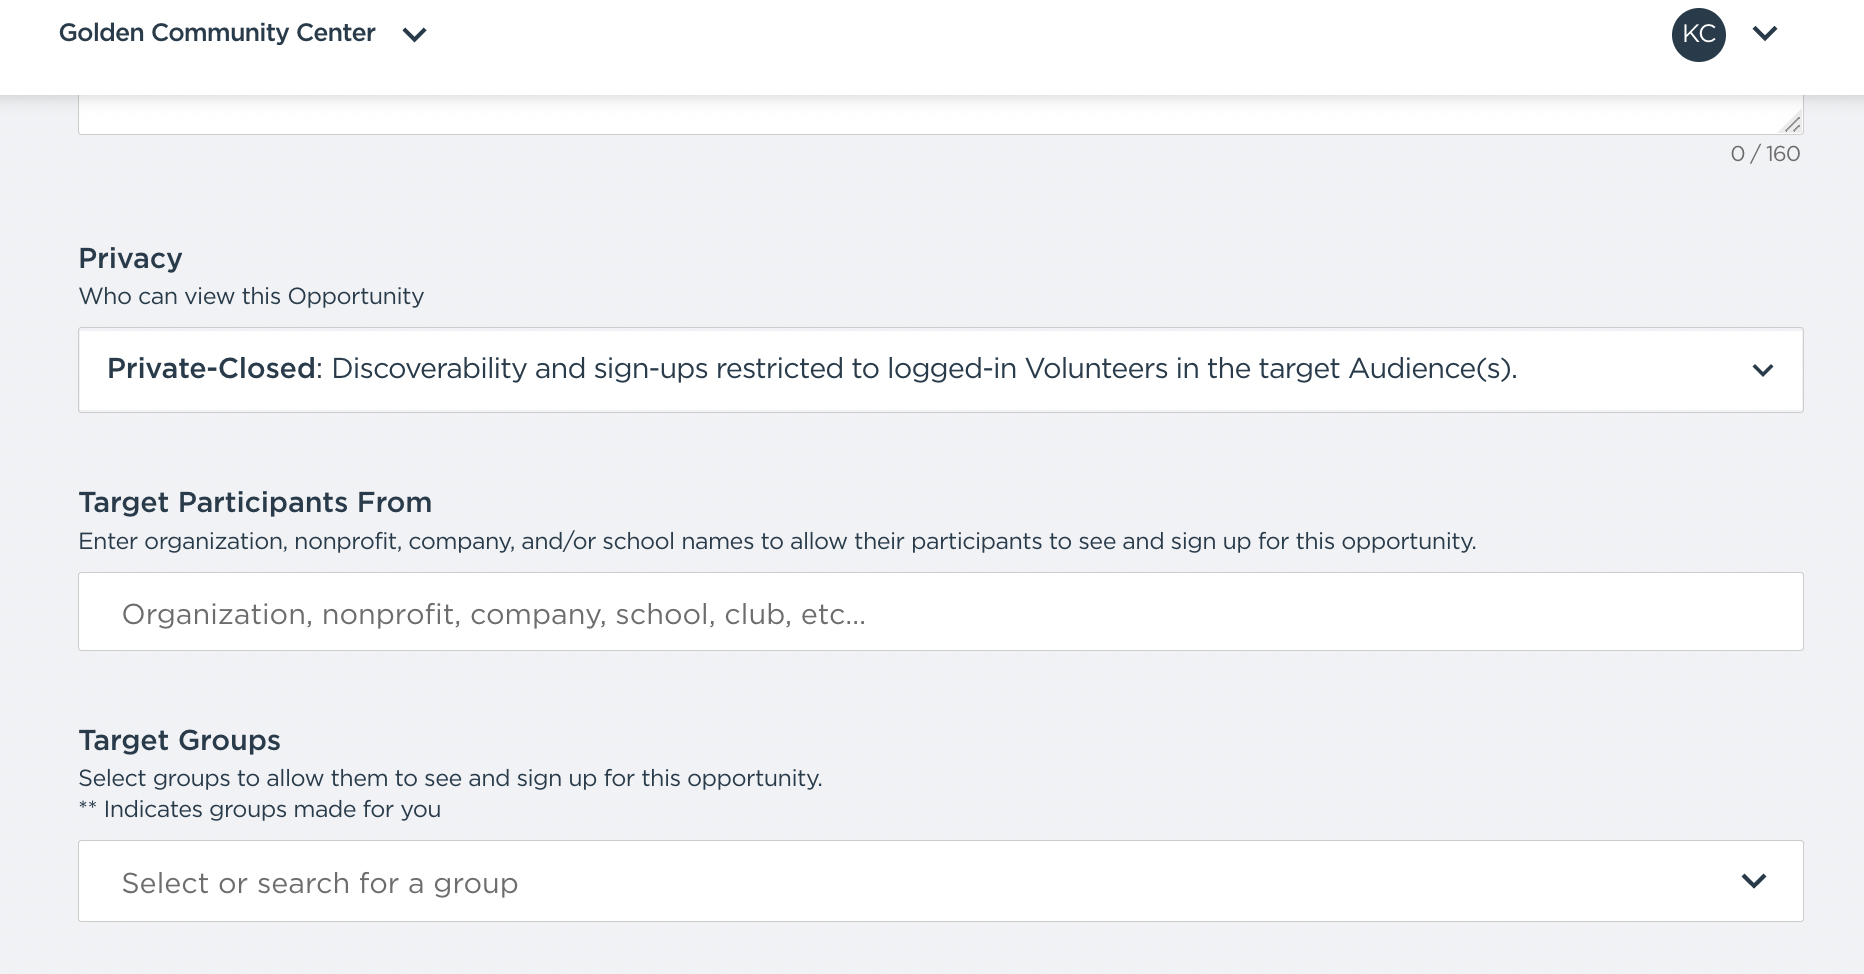
2. Set the Right "Audience" (aka Privacy):
Most applications should be set to "Open" so that anyone visiting your web portal can find them. In case that's not the case...
- Want to share the application to a certain group of people? --> Set the audience to Private-Open.
- Want to restrict the application to a very specific group of people and no one else? --> Set the privacy to Private-Closed (*and make sure you target the appropriate Group!!)
- Want anyone to apply? --> Set the audience to Open.
3. Where do you want to recruit from?
Is your program in a specific region or local area? You'll want to leverage the Audience Geography feature to make sure you're targeting volunteers who live or work near your program.
4. Set a Location (or not!):
In Part 3" is the Location section. Because this is just an application, you're likely not going to have a physical location, but you may want to choose:
- "Digital location" - if you want volunteers to check out a website or send you an email to move forward with next steps. Entering a "digital location" ensures that Golden automatically prompts the volunteer to follow whatever link (or email address) you paste here.
- "No location" - this is likely the best option.
- You can also list a contact name and number (or email address) where applicants can reach out with questions
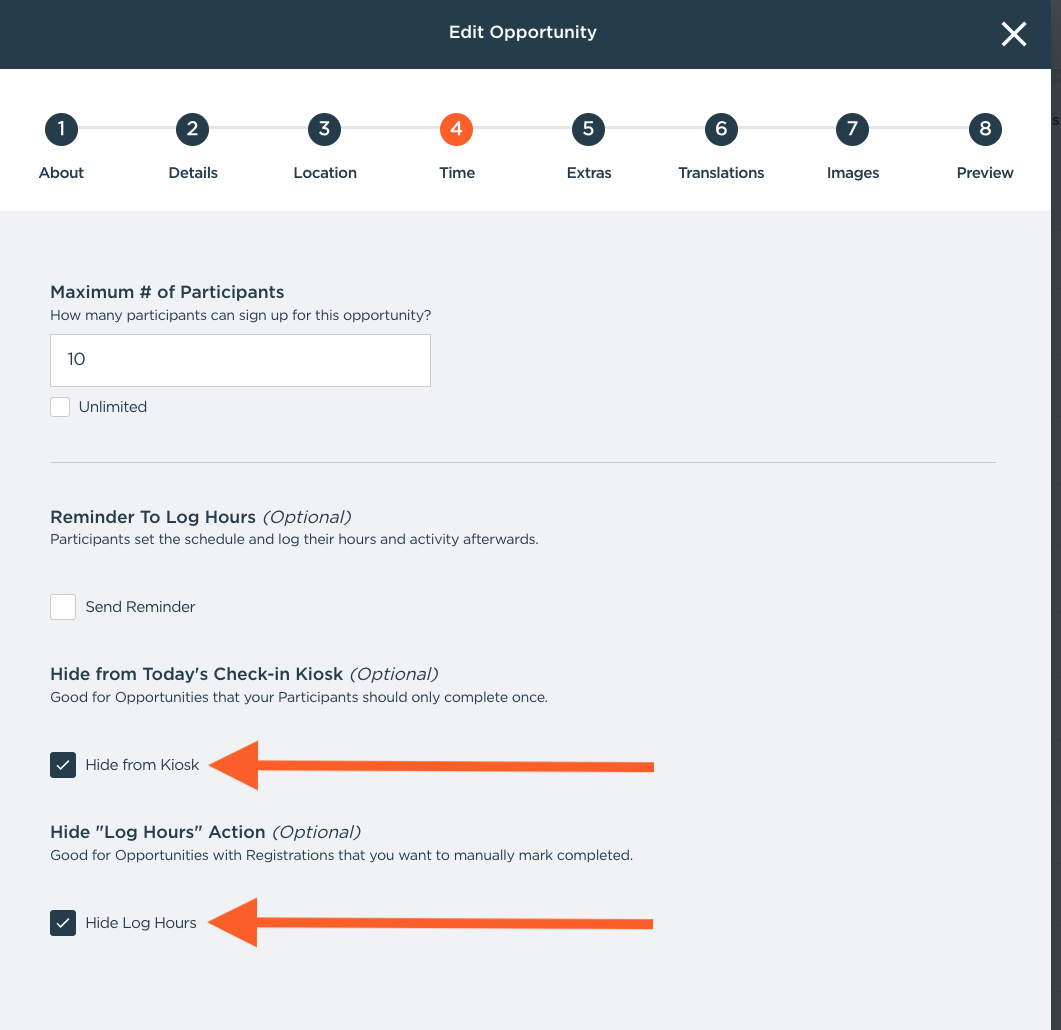
5. Time:
For the time section, (“How flexible is the timing?”), here is what you do:
- Choose "On Your Own" for the time type
Important Note!: You should check off the boxes in the below screenshot so that the listing functions like a form rather than an actual volunteering Opportunity.
6. Extras:
Post Registration Instructions
- This is a great place to tell volunteers what will be expected of them after they fill out their application (like "we'll do an interview followed by a training session!").
- You can also upload any waiver(s) that you may require, require volunteers to complete Golden's background check, and request specific info like phone #, mailing address and more.
Additional Questions
Your application probably has specific questions you need to know from volunteers ("List some references", or "Do you prefer cats or dogs?").
Using Golden's "Additional Questions" section is the best way to capture these answers. You'll be able to...
- You can decide to ask short answer/paragraph-style or multiple-choice questions
- Note: Golden will automatically sort applicants into Groups based on the multiple-choice answers that they provide (ex. "Do you prefer cats or dogs?" will sort applicants into an "I prefer cats" or an "I prefer dogs" Group).
- Mark them as either required or optional
- Add as many questions as you need
- You can save these responses as Profile data points so that they show on exports
7. Reviewing and Processing Applicants
How do I view Application details?
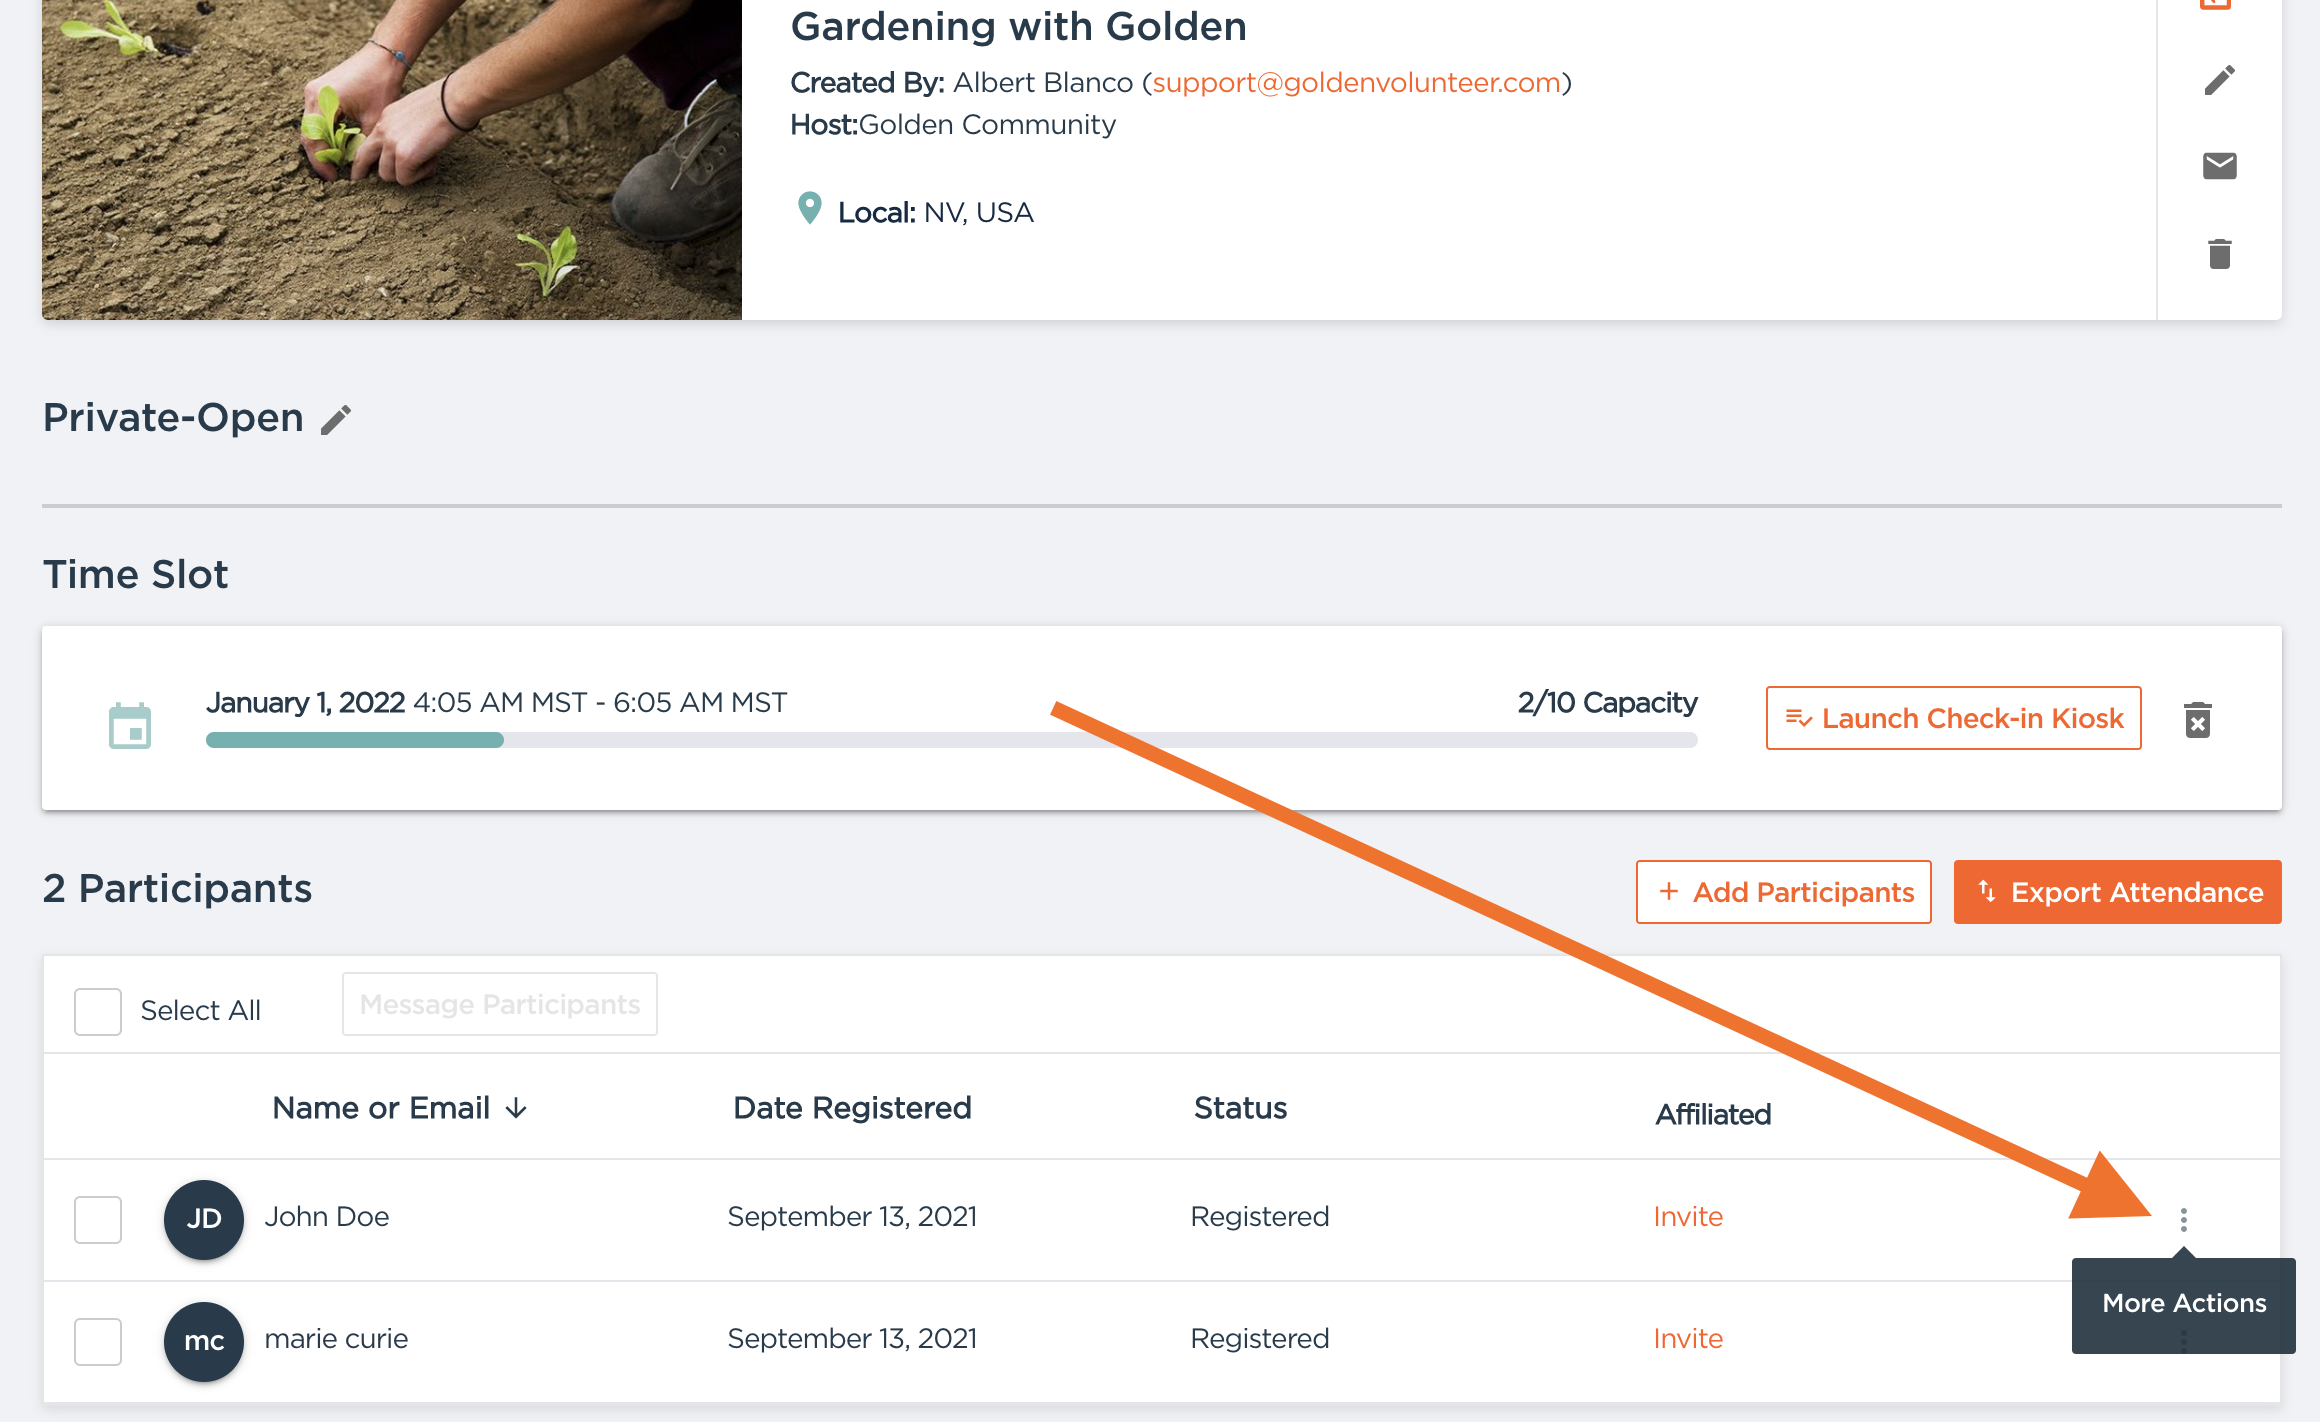
To view application details, navigate to the application Opportunity's management page (click on the Opportunity's name in either the Overview or My Opportunities tabs). There you will find Applications under Participants, in the registered state.
You can click on each applicant's name to see their personal information, and click on the 3-dot menu on the far right side of each applicant's registration entry to see the answers to the Additional Questions:
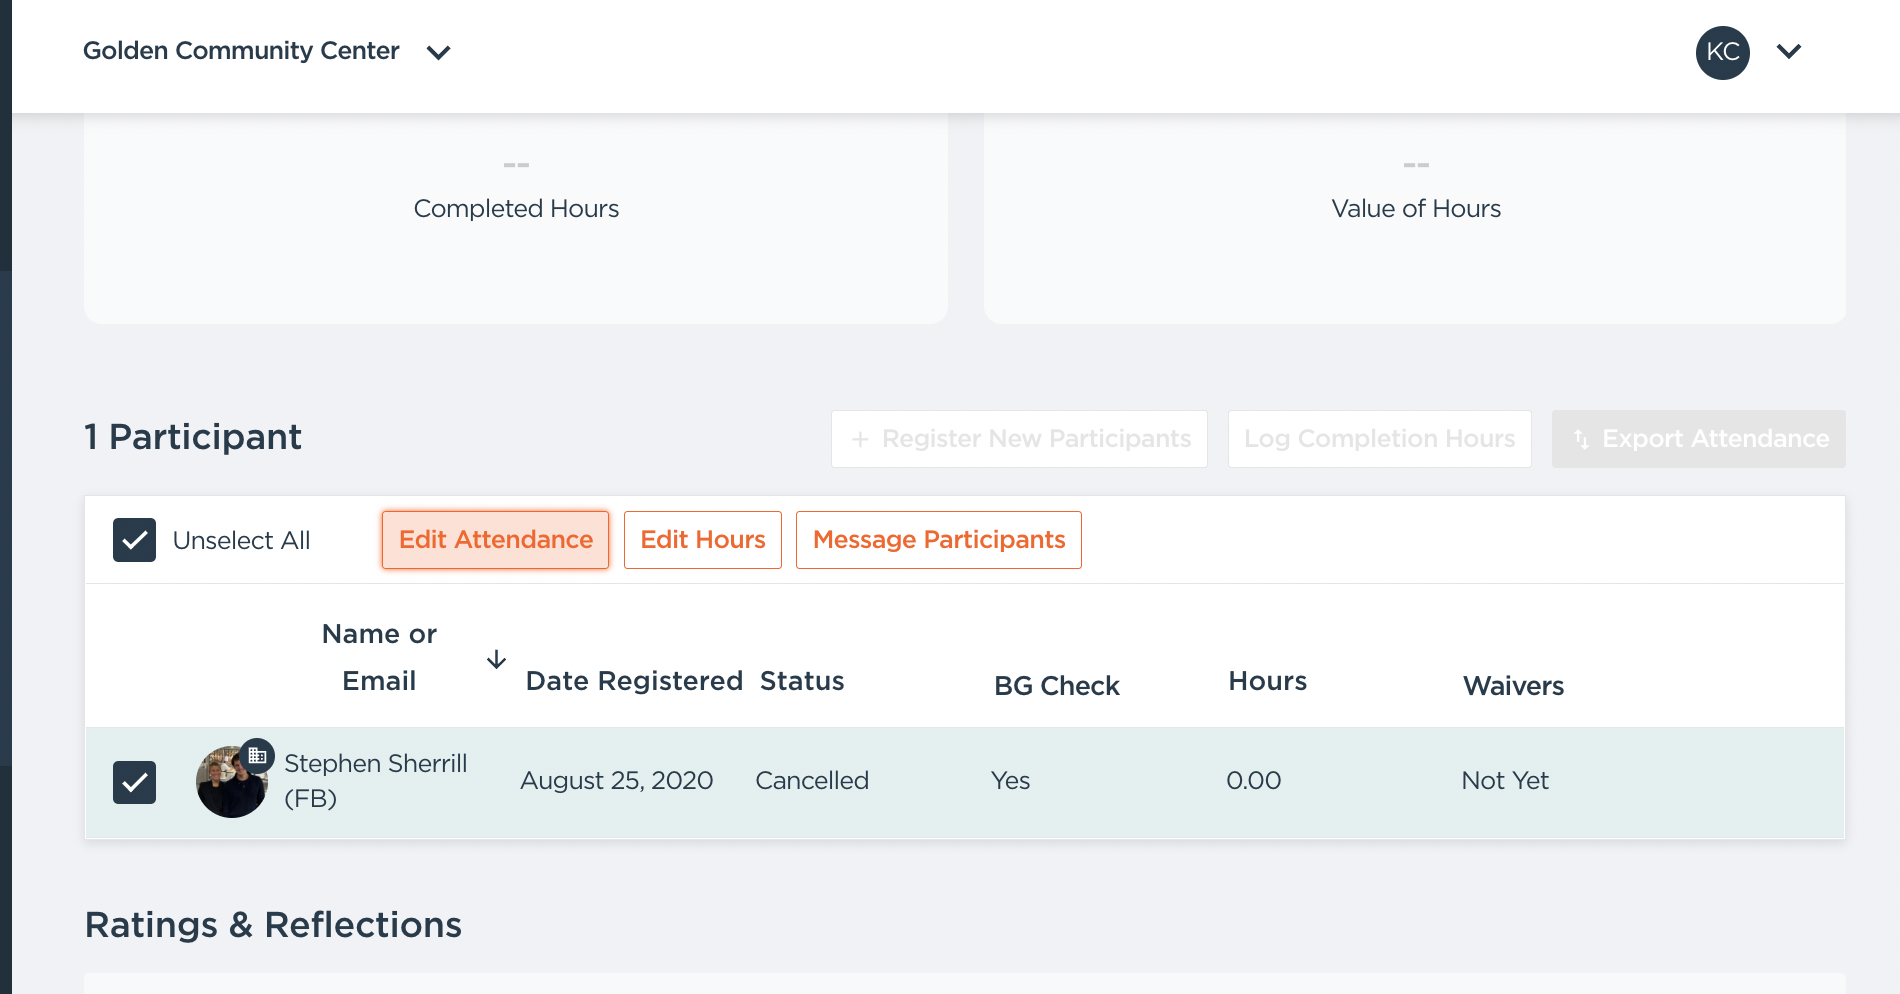
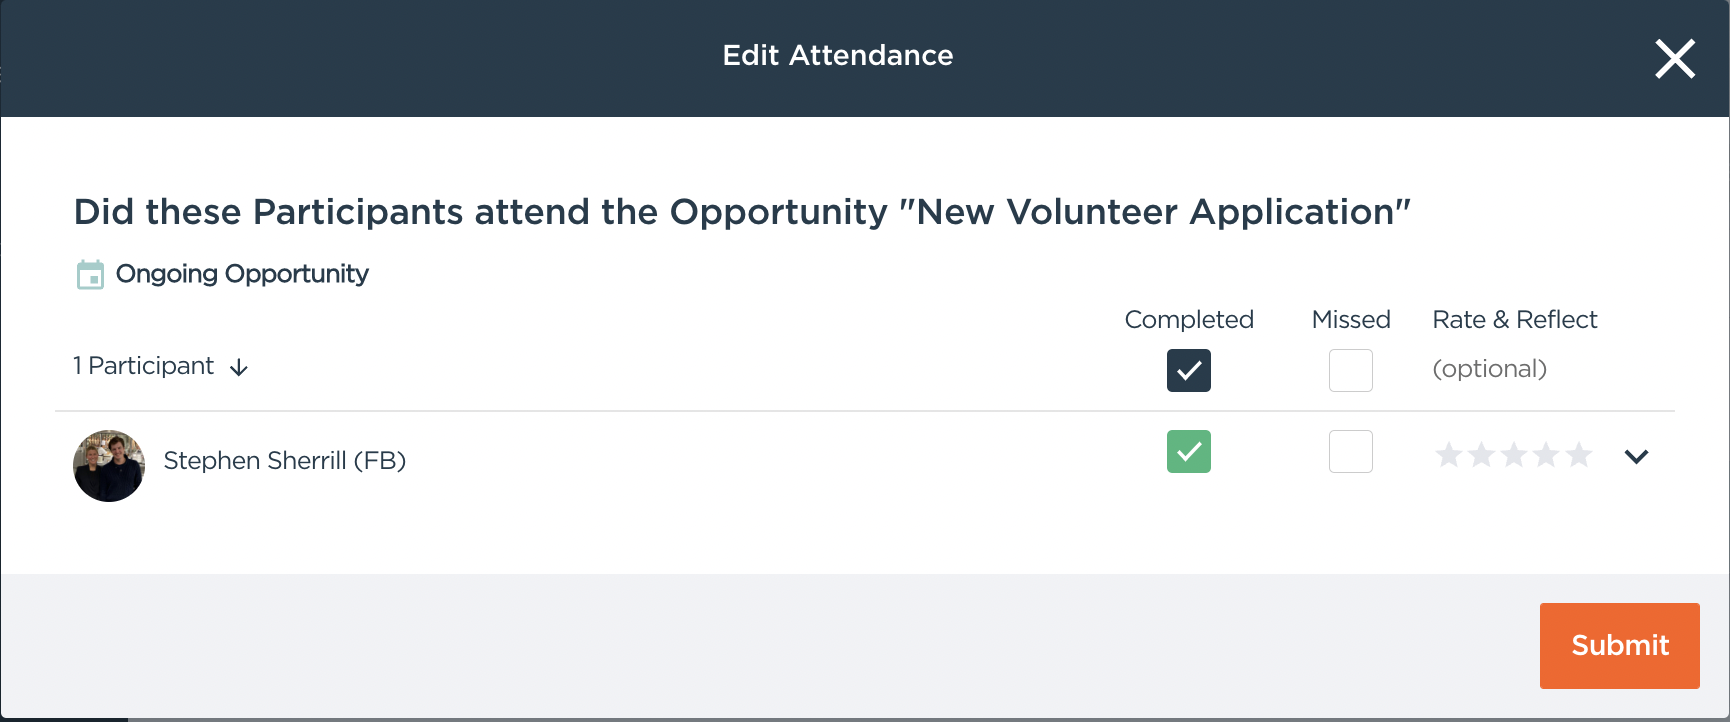
How do I mark Applications as Accepted or Rejected?
Once you've reviewed Participants, you should "Edit Attendance" to:
- Accept the Application: mark as "Completed"
- Reject the Application: mark as "Missed"
8. Automatically push Accepted Applicants to the next step
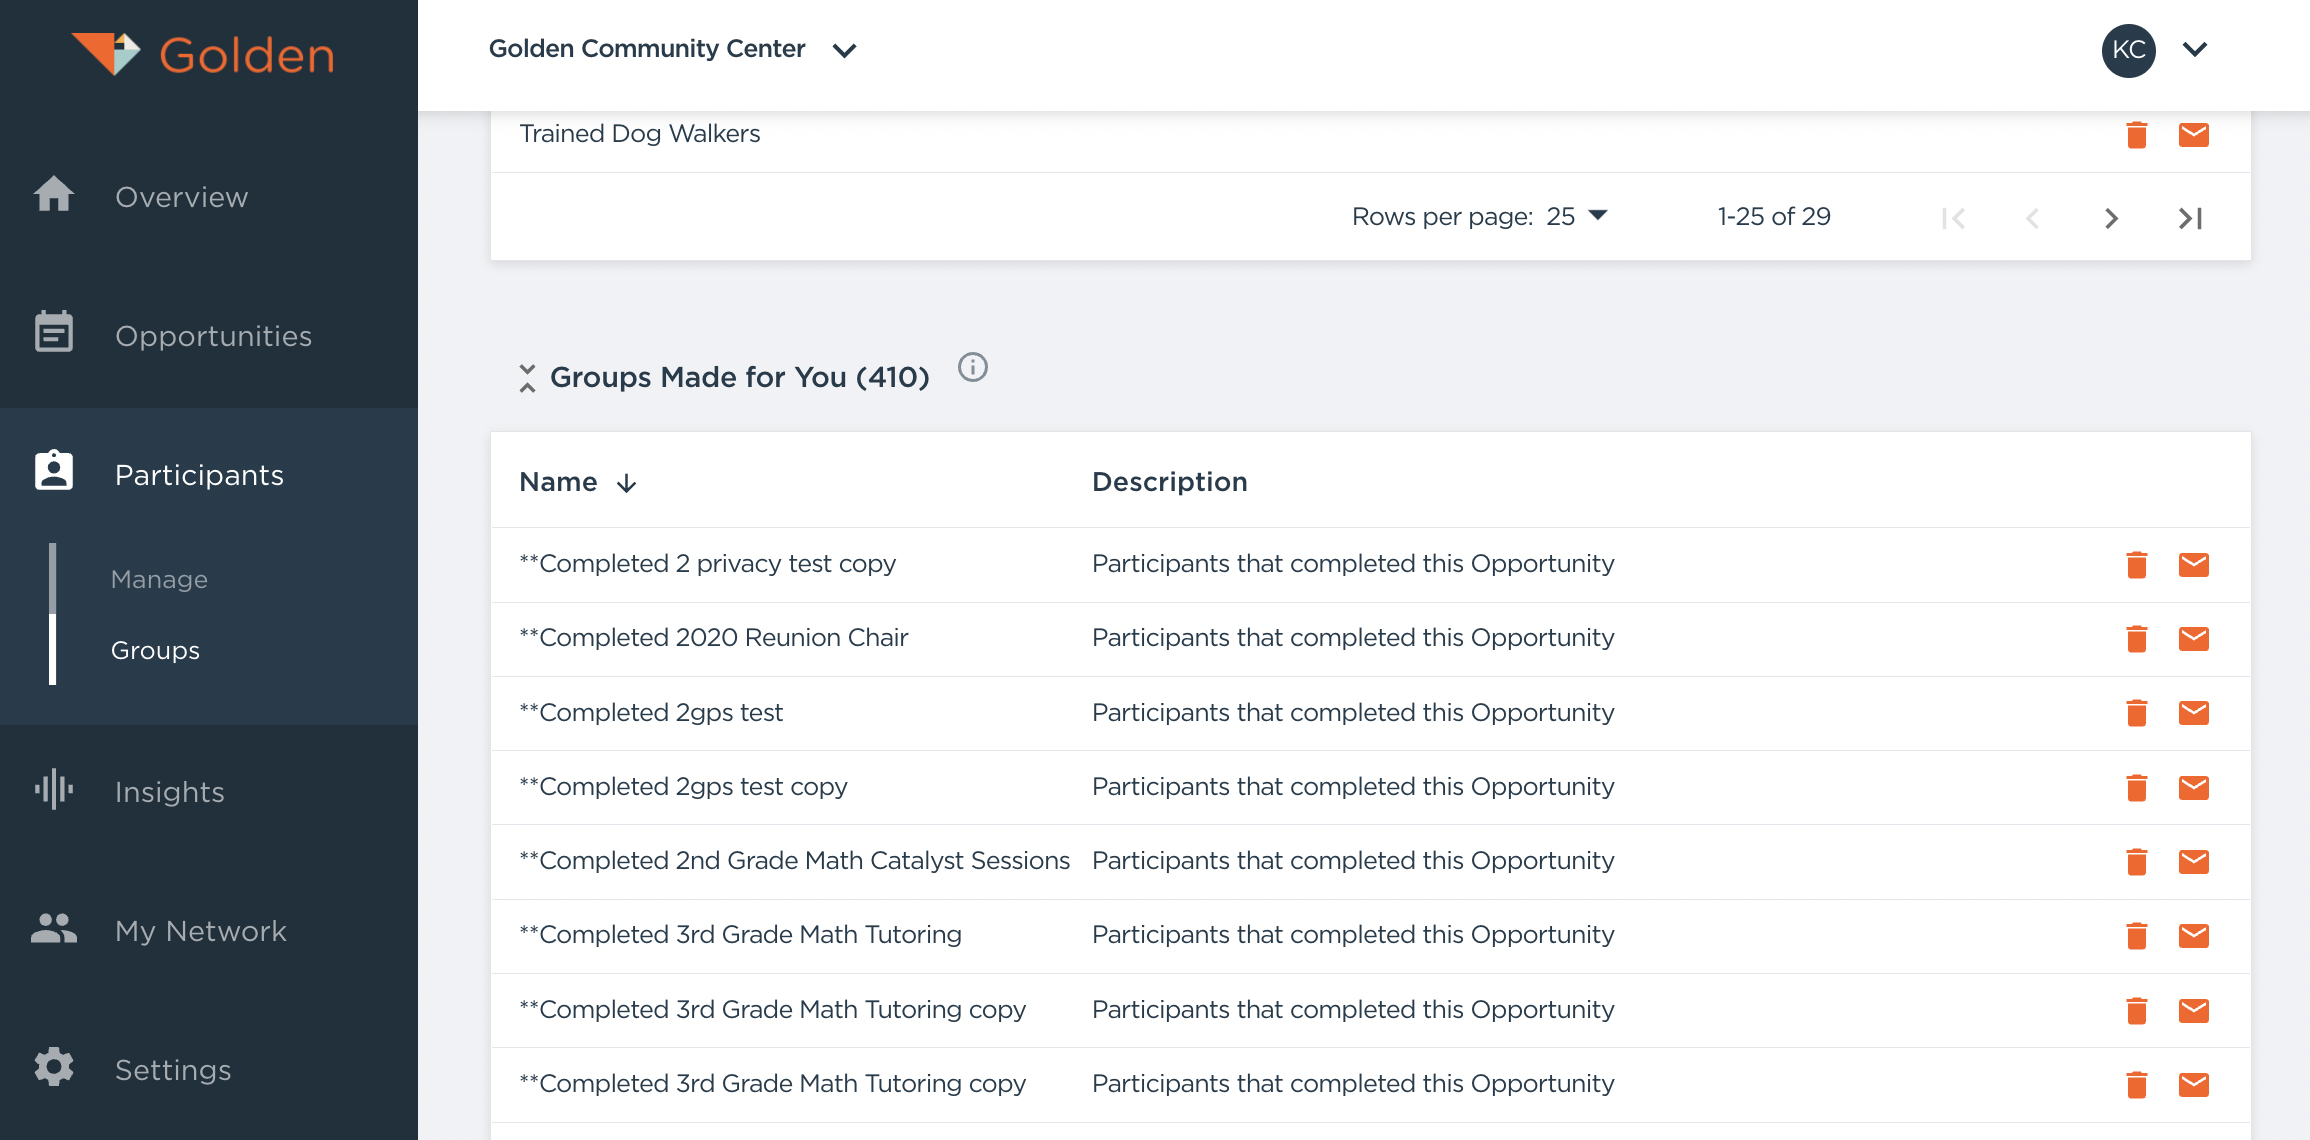
Applications that you mark as "Completed" will automatically be placed in a group called "**Completed [whatever you titled the Application]".
You can find this group by navigating to Participants>>Groups tab in the "Groups Made for You" section.
Create the Next Step
After completing their application, do volunteers have to attend an orientation session? A training session? Maybe interview with one of your colleagues?
The best part of this whole thing is that you can have Golden automatically push volunteers from one step to the next!
When you create your Orientation, Training, Interview (or whatever comes next!), set the "Audience" to "Private-Closed" and the Target Group is the "**Completed [whatever you titled the application Opportunity]" Group mentioned above.
This will do two things:
- Every volunteer whose Application is "accepted" will automatically receive an email prompting them to sign up for the Orientation/Training/Interview etc.
- Only volunteers whose Applications are "accepted" will be allowed by Golden to register for the Orientation/Training/Interview etc.
Important Note:
- It is advised to only list Opportunities that have specific next steps. Our data shows that without specific next steps, volunteers are 7.6x more likely NOT to follow through. Give your applicants a clear pathway to volunteer with your organization and make an impact together!