
This guide shows you how to create a Custom Reservation that holds spots for a group across one or more time slots. With this update, you can now select multiple dates and times in a single reservation, set a different spot count for each slot, and let Golden set up large reservations in the background so you're not stuck waiting on the page. You can view this video to help answer questions before you begin: Creating Custom Reservations
What's New
- Reserve spots across multiple time slots in one workflow — no more creating a separate reservation for each date.
- Default per slot — set a spot count once and apply it to every slot you've selected with one click.
- Per-slot overrides — give any individual slot a different spot count than the default.
- Select individual days and dates filters — narrow a long list of time slots down to the dates you actually need.
- Background processing — reservations spanning many slots or spots are set up asynchronously, with a live "Setting up…" status so you can keep working while it finishes.
- A slot-by-slot breakdown on the Custom Reservations dashboard, so you can see openings and claims for each date at a glance.
- New tools and accessibility for Group/Reservation Leaders
Before You Start
You'll need:
- The appropriate permissions and access to the Opportunity as the Admin, Opportunity Manager or Writer that you’re creating the reservation on.
- The group's name (or the group leader's email, if the group is new to your network).
- The dates, times, and number of spots you want to hold.
Step-by-Step: Create a Custom Reservation
1. Open Custom Reservations: From the Opportunity, open Custom Reservations in the left navigation. Click + Create New Custom Reservation (this button appears both in the header and in the empty state if no reservations exist yet).
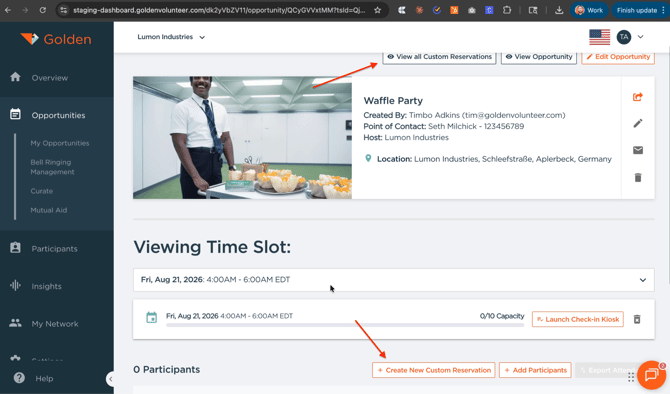
The Custom Reservations page for an Opportunity, before any reservations have been created.
2. Tell Golden who the reservation is for
In Step 1 — Who is this reservation for?, fill in:
- Group Name — start typing to search existing groups in your network. If the group doesn't exist yet, an "Add new Partner" option appears so you can create it on the fly.
- Group Leader Email — this person receives an email invitation to manage the reservation and add participants. They become the group's main point of contact in your network.
- Externally managed — check this box if the group's participant roster will be tracked outside Golden. This is new and perfect for corporate groups that wish to keep their employee information for themselves, while still managing their reservation. Leave it unchecked (the default) if the group leader will add and manage participants in Golden.
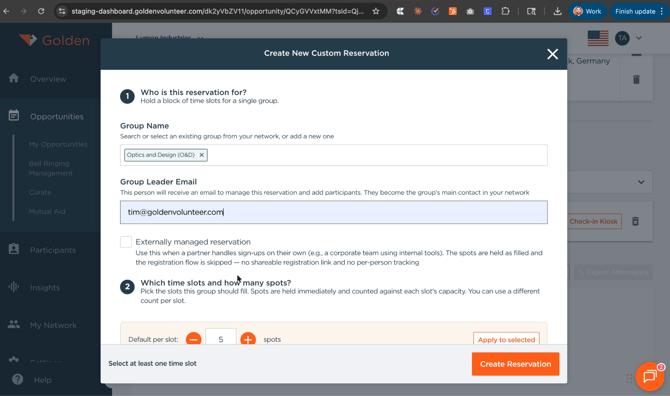
Step 1 of the Create New Custom Reservation modal, with the group and group leader fields filled in.
3. Choose time slots and spot counts
In Step 2 — Which time slots and how many spots?, you'll pick every date this group should be held spots for. Spots are held immediately once a slot is checked, and count against that slot's capacity right away.
- Set a Default per slot count using the +/- controls or by typing a number.
- (Optional) Use the Select days and Days filters to narrow the list to a specific date range or day of the week.
- Check the box next to every time slot you want to include. Each row shows how many spots are available, and updates live to show how many will remain after this reservation is applied.
- Click Apply to selected to push the default count to every slot you've checked, or adjust any slot's count individually using its own +/- control.
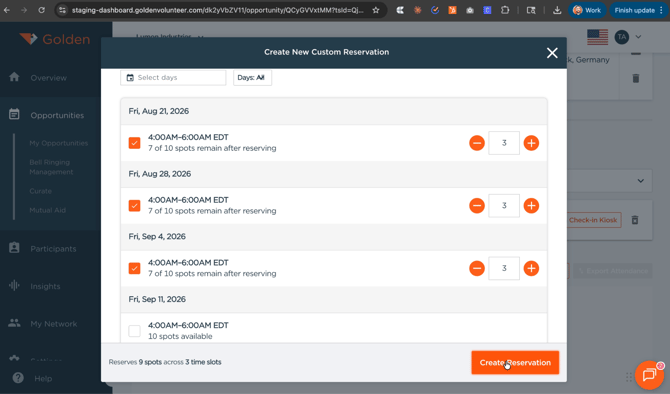
Selecting a single time slot and setting its spot count — the row updates to show remaining availability.
For a reservation that spans several dates, simply check multiple slots. The footer at the bottom of the modal keeps a running total:
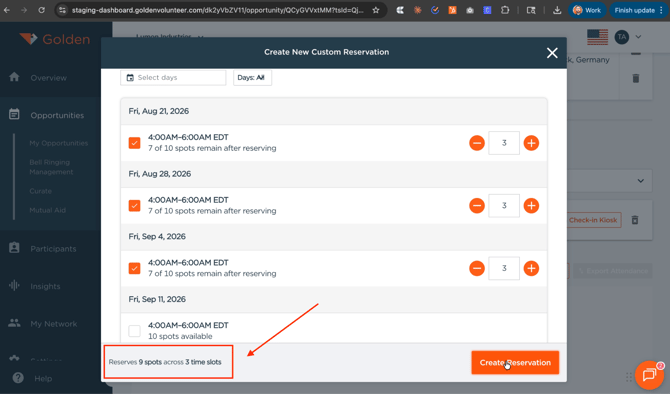
Four time slots selected across four dates, each set to 13 spots via the Default per slot control.
Note: Large multi-slot reservations (many slots and/or many total spots) are set up in the background. You'll see a message like "Reserves 52 spots across 4 time slots — we'll set this up in the background and it may take a moment to finish." You can safely close the confirmation and keep working; the reservation will finish provisioning on its own.
4. Create the reservation
Click Create Reservation. You'll see a confirmation screen while Golden sets things up.
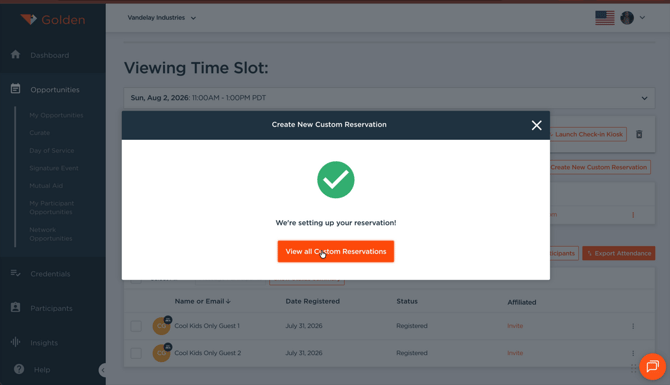
Confirmation shown immediately after submitting a reservation.
Click View all Custom Reservations to return to the dashboard. Multi-slot reservations show a "Setting up…" status until all slots have finished provisioning — refresh the page after a moment if you still see this status.
Managing a Reservation After It's Created
Once a reservation finishes provisioning, expand its row on the Custom Reservations dashboard to see every slot it covers, along with an openings count for each one.
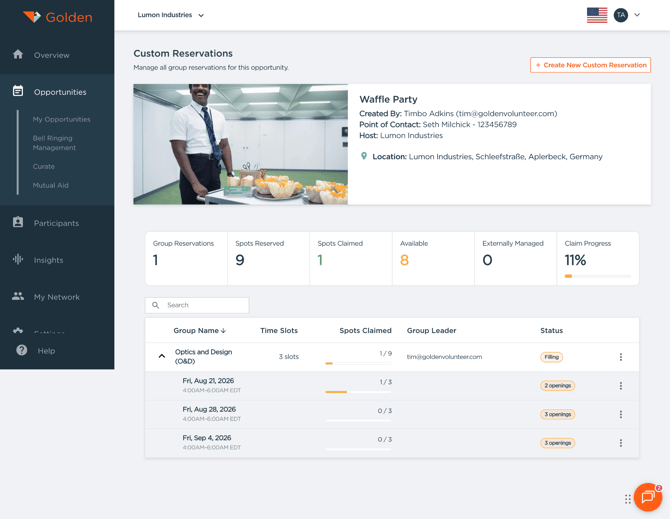
A completed reservation, expanded to show each date's individual spot count and status.
The dashboard summary at the top of the page tracks, across all reservations for the opportunity:
- Group Reservations — the number of groups with a reservation.
- Spots Reserved — total spots held across all groups and slots.
- Spots Claimed — how many of those held spots have an actual registered participant.
- Available — reserved spots that haven't been claimed by a participant yet.
- Externally Managed — spots belonging to reservations marked Externally managed.
- Claim Progress — the percentage of reserved spots claimed so far.
Viewing and managing a specific time slot
From the Opportunity page (this is different than the Reservation page), click into any time slot (from the reservation row or from the Opportunity's time-slot list) to:
- See who's registered and their status.
- Add Participants manually or Export Attendance for the slot.
- Message individual or multiple Participants
- Launch Check-in Kiosk for day-of check-in.
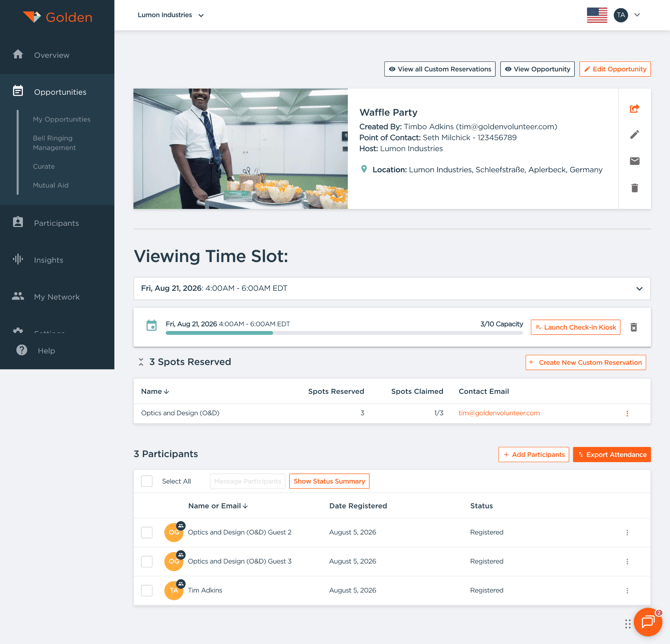
A time slot's detail view, showing the group's reserved spots and its placeholder participant records.
Note: When you reserve spots for a group, Golden automatically creates placeholder participant records (e.g., "[Group Name] Guest 1") so the spots are accounted for immediately. Use Invite to connect a placeholder to a real participant once the group leader adds their roster.
Tools for the Group/Reservation Leader
Golden provides free tools for your corporate or group leaders, so they can manage their volunteers without wondering who has signed up or how many slots still need to be filled.
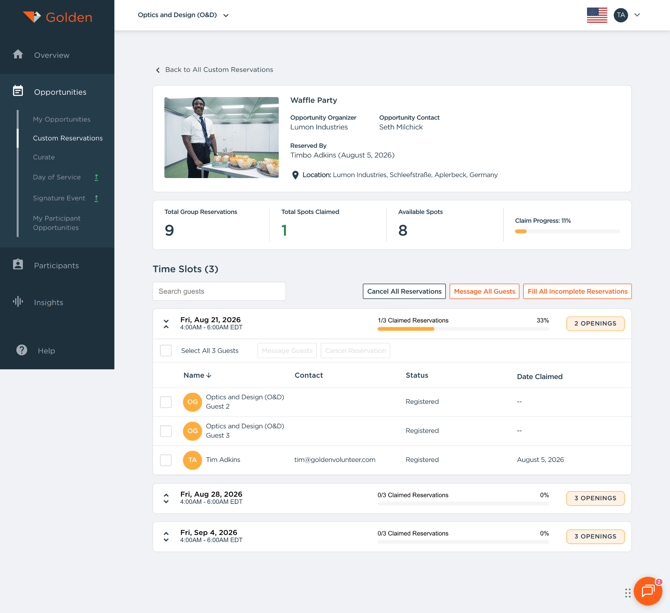
Exclusive Access to a Custom Dashboard
Through the invitation link sent directly to the Group/Reservation Leader’s email, they will be able to quickly see all of their reservations across multiple days and time slots.
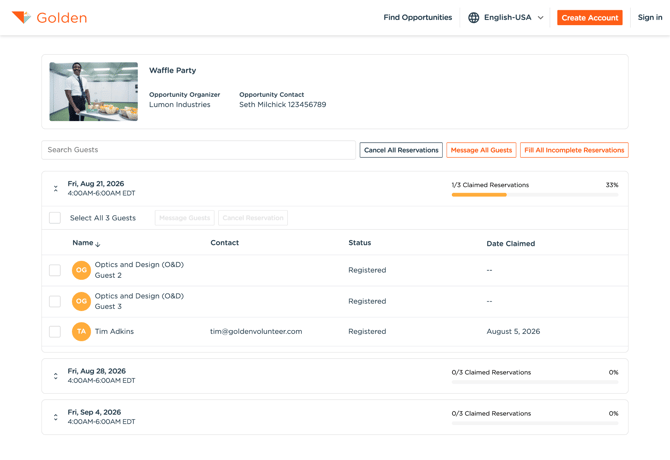
Edit and Manage Reservation
With exclusive access to a custom dashboard, your Group/Reservation Leader, can manage and edit the existing reservation. To get to this dashboard, simply follow the link provided in the email invite.
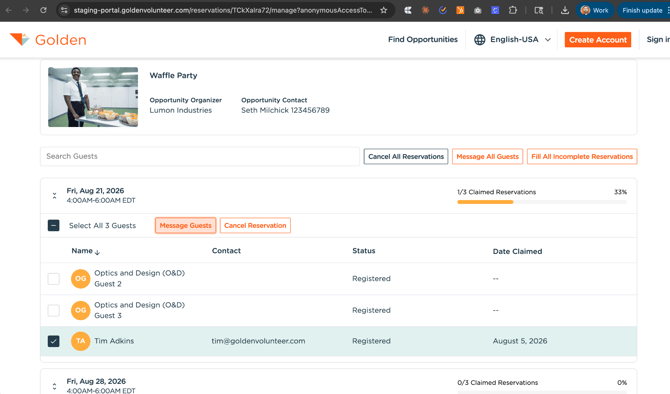
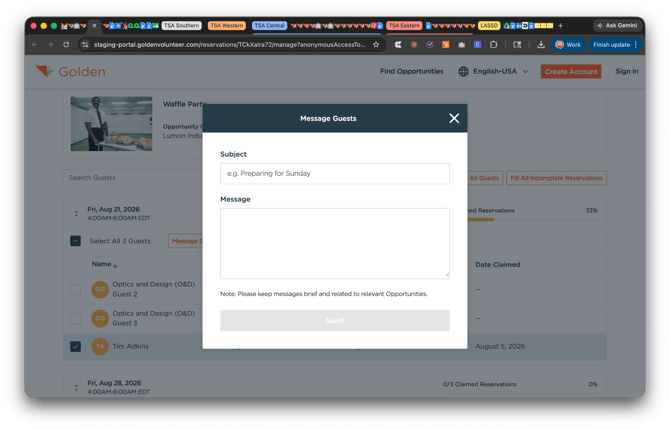
Access to Built In Communication Tools
Directly message participants with updates or important news or quickly access a share link to help complete the reservation.
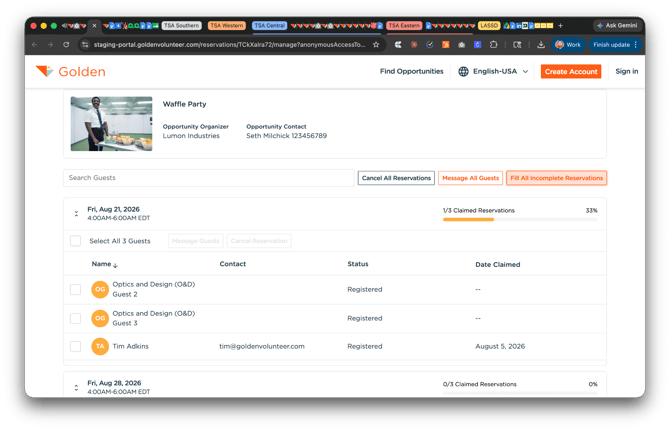
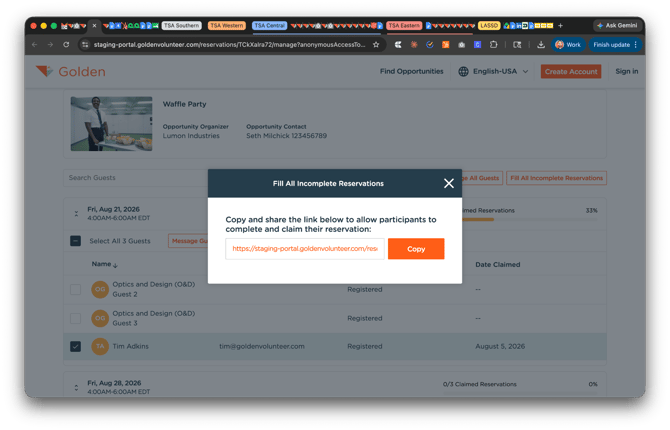
*When creating the Custom Reservation, if the organizer admin selected the Externally Managed option, all details of the reservation will be locked.
Frequently Asked Questions
What happens if I select more slots than fit on one screen?
Scroll the slot list within the modal — it's grouped by date. Use the Select days or Days filter to jump to a specific range instead of scrolling through every date.
Can different slots in the same reservation have different spot counts?
Yes. Apply a default to all selected slots with Apply to selected, then adjust any individual slot's count using its own +/- control before creating the reservation.
Why does a reservation show "Setting up…" after I click Create Reservation?
Reservations covering a large number of slots or spots are provisioned in the background so the page doesn't have to wait on every slot to update. This is expected — check back in a moment and refresh.
What's the difference between Spots Reserved and Spots Claimed?
Spots Reserved is the block held for the group the moment the reservation is created. Spots Claimed is the subset of that block tied to an actual registered participant. A reservation can show all spots reserved and zero claimed if the group hasn't added their roster yet.
Related Articles